How To Use Webnode in 2024: A Beginner’s Guide

Last Updated: By TRUiC Team
Webnode may not offer the best-known website builder out there, but this tool is just as straightforward and simple to use as its competitors. It can provide the perfect choice for small business owners who want to easily build and manage a professional website.
Like many other website builders, the Webnode website builder uses content blocks — referred to as sections — to streamline the design process. It also enables you to easily edit headers, footers, and other elements of your site with a minimal learning curve.
This guide will show you how to use the Webnode website builder. By combining our guide with Webnode’s extensive knowledge bank, you can quickly become adept at using Webnode to create a business website that meets your needs.
Make sure Webnode is right for your small business website. Check out our Best Website Builder Review to see our top choice.
Webnode Overview
The Webnode website builder is designed to be easy to use, but you should know several things about this platform before getting started:
- Webnode provides an extensive Knowledgebase where you can find information about the website editor and other aspects of the service.
- You’ll make all website edits via the platform’s website editor. You can find this editor in the “My Projects” section of your Webnode account.
- The website editor autosaves any changes you make, but you must exit text boxes before Webnode will save the revised text.
- When you want to make your changes apply to your live website, you need to click on the “Publish” button.
Sign up for Webnode
You may have already done this, but if not, begin by signing up with Webnode. The sign-up process will have you choose a type of website, buy or transfer your existing domain, and select a template for your new website.
The best features of Webnode are only available for premium subscribers. We recommend upgrading to a premium (paid) plan so you can take advantage of those features.
Using Webnode Templates
Webnode requires you to choose a template when you first sign up. Once you select your Webnode template, you can’t change it. But, you can customize it based on the needs of your business.

Not sure which Webnode template is right for your business? Check out these Webnode website examples for a little design inspiration.
Changing Webnode Website Colors
You can change the accent color for your Webnode website at the template level. This complementary color shows up on the text you specify in the advanced settings.
To change your template’s accent color:
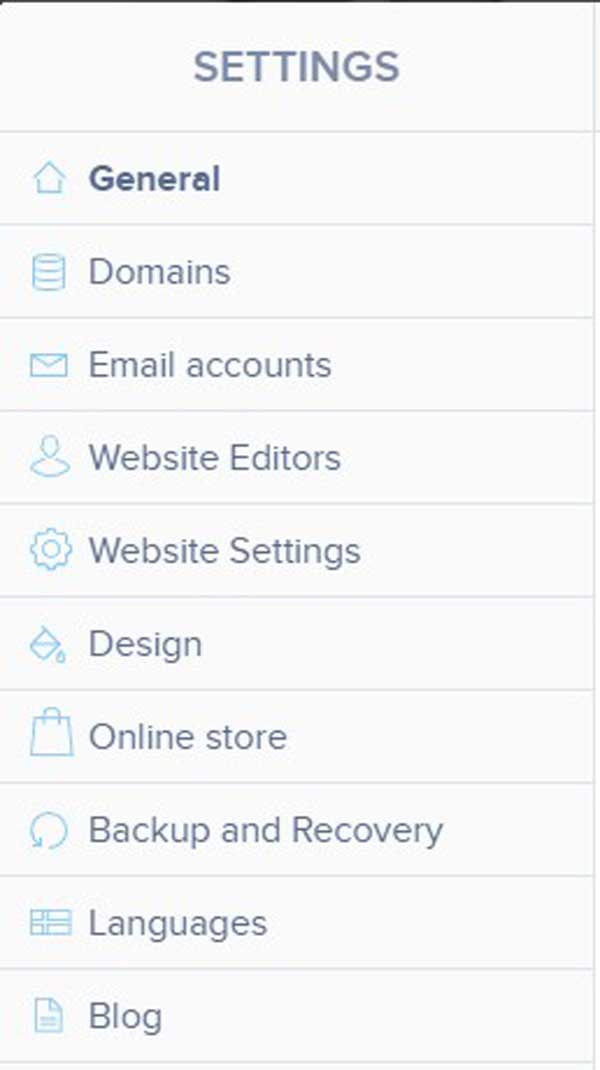
- Beginning at the website editing page, click on the “Settings” icon at the top of the screen.
![How to use Webnode.]()
- Click on the “Design” option in the menu that then appears.
![How to use Webnode.]()
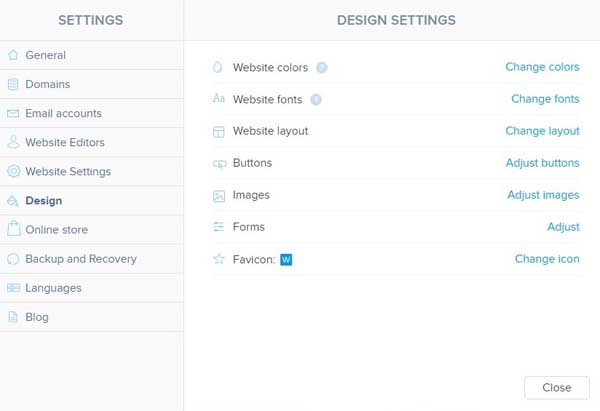
- This’ll open the “Design Settings” menu, from which you should choose the “Change colors” option.
![How to use Webnode.]()
- Clicking on the “Change colors” link will automatically take you back to the website editing page view. You’ll now see a “Color settings” option at the top of the screen with a color block on its right.
![How to use Webnode.]()
- Click on the drop-down arrow to the right of that color block.
- Choose a new accent color.
- Next, click on the “Advanced settings” option at the top of this screen to choose where your new accent color will appear.
- When you’re done, click on the “Save changes” button.

Changing Webnode Fonts
The Webnode website builder also lets you change the global fonts for your website template.
To change the fonts:
- Starting at the website editing page, click on the “Settings” icon at the top of the screen.
- Click on the “Design” option in the menu that then appears.
- Find and click on the “Change fonts” option in the “Design Settings” menu that then opens.
- Back at the website editing page, you’ll now see a “Font settings” option at the top of the screen. Click the drop-down font menu to choose a new font.
- When you’re done, click on the “Save changes” button.
Customizing Buttons in Webnode
You also can adjust your Webnode button settings in the website builder to make them similar in design, size, and shape.
To customize your button settings:
- Starting at the website editing page, click on the “Settings” icon at the top of the screen.
- Click on the “Design” option in the menu that then appears.
- Find and click on the “Adjust buttons” option in the “Design Settings” menu that then opens.
- Back at the website editing page, you’ll now see a “Button settings” option at the top of the screen.
- Use the shape, decoration, size, and border width options to change how your buttons will appear.
![How to use Webnode.]()
- When you’re done, click on the “Save changes” button.

Modifying the Images in Webnode
The Webnode website builder lets you modify your image settings. You can adjust the shape, size, and overall design for each image on your site.
To modify the image settings:
- Beginning at the website editing page, click on the “Settings” icon at the top of the screen.
- Click on the “Design” option in the menu that then appears.
- Find and click on the “Adjust images” option in the “Design Settings” menu that then opens.
- Back at the website editing page, you’ll now see an “Image settings” option at the top of the screen.
- Use the description, corners, hover animation, and image detail background options to modify the image settings to meet your needs.
![How to use Webnode.]()
- When you’re done, click on the “Save changes” button.

Customizing the Webnode Header
Every template in Webnode includes a header with a title, logo, and navigation menu. The header customization tool allows you to alter the appearance and functionality of this header.
To upload your business logo:
- Click on the header in the upper-left corner of the screen. A pop-up menu will then appear from which you can choose either “Logo” or “Format.”
- Choose the “Logo” option.
- A prompt will then ask you to select between “Change logo” and “Remove logo.” Choose the “Change logo” option.
- Select an image by clicking on the “+ Upload image” button in the upper-right corner of the screen.
![How to use Webnode.]()
- Find your business logo file (either on your computer or server), and then click on the “Open” button.
- Double-check to ensure your upload was successful, and then select “Close.”

Update Additional Webnode Features
The header plays a key role in your website’s overall user experience (UX). That’s why it’s important to ensure the header is on-brand and supports the purpose of your website.
There are two main elements to the header within the Webnode website builder – the “Navline” and the “Claims” and “Content” sections.
- The “Navline” is the area that includes the title, logo, and navigation menu.
- The “Claims” and “Content” sections appear right below the “Navline” area. These sections can include a heading, subheading, image, call-to-action (CTA) button, and more.
Changing the Header Type
You can select from three header types: “Navline Only,” “Navline & Claims,” and “Navline & Content.” Take a look at each type of header to determine which is best for your website.
To change your header type:
- Hover your cursor over the navigation bar until you see a “Gear” icon appear.
![How to use Webnode.]()
- Click on the “Gear” icon to open a drop-down menu of navigation bar settings.
- Select the “Header Type” option.
- Choose the type of header that makes the most sense for your business.

Changing the Header Image or Color
Using the Webnode website builder, you can change the color or the image that appears behind the “Navline” and “Claims” or “Content” section of your site’s header.
To change your site’s “Navline” and “Claims” or “Content” section’s image or color:
- Hover your cursor over the navigation bar until you see a “Gear” icon appear.
- Click on the “Gear” icon to open a drop-down menu of navigation bar settings.
- Select the “Navline background” option to change the Navline’s image or color.
- Select the “Section background” option to change the image or color of the “Claims” or “Content” section.
- Follow the prompts to make your preferred changes.
Setting up Webnode Pages and Navigation
Most small business websites have more than one page. The main navigation menu helps visitors find the information they seek among your site’s different pages. You’ll want to ensure your Webnode navigation menu — and any drop-down, submenus attached to it — provide clear direction for your visitors. From time to time, you also might want to delete and/or add pages to your site’s navigation menu.
Changing Your Site’s Page Structure
Each Webnode website template includes several standard pages. You may need to rearrange, add, or delete pages to achieve the optimal structure for your business website.
To change the page navigation on your site, click on the “Pages” icon at the top of the screen. This’ll open the “Pages” menu.

In the “Pages” menu, you have the option to add, edit, and delete pages. You also can change their order.
To delete a page:
- In the left sidebar of the “Pages” menu, click on the name of the page you want to delete.
- Select the “Delete Page” option from the drop-down menu that then appears.
- Confirm your choice by clicking on the “Delete” button.
- When you’re done editing the navigation menu, click on the “Close” button.
To add a page:
- In the upper-right corner of the “Pages” menu, click on the “+ Add page” button.
- Select a page template from the available option, and then click on the “Choose” button underneath that template.
- Type in a name for your new page.
- Click on the “Create” button
- When you’re done editing the navigation menu, click on the “Close” button.
To rename a page:
- Select the name of the page you want to edit from the left sidebar of the “Pages” menu.
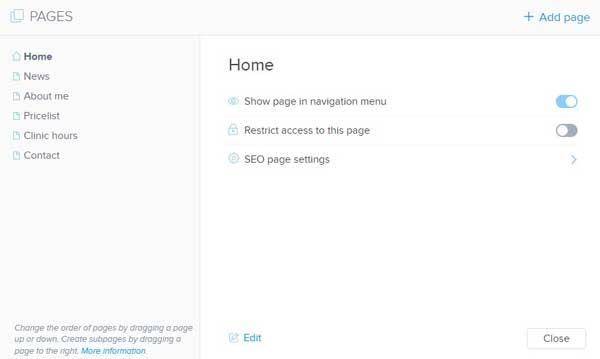
- Place your cursor in the text bar showing the name of the page in the window that’ll then appear to the right of the “Pages” menu.
![How to use Webnode.]()
- Type in a new name for the page.
- When you’re done editing the navigation menu, click on the “Close” button.

To reorder pages within the navigation menu:
- Drag and drop pages on the left sidebar of the “Pages” menu to change their order.
- When you’re done editing the navigation menu, click on the “Close” button.
Changing the Menu Type
You can further customize your site’s “Navline” and navigation menu by changing the menu type.
To change your menu type:
- Hover your cursor over the navigation menu to make the “Gear” icon appear.
![How to use Webnode.]()
- Click on the “Gear” icon to open a drop-down menu of navigation bar settings.
- Click on the “Advanced settings” link.
- Choose the “Menu type” option.
- Pick from one of the available menu types:
- “Classic”
![How to use Webnode.]()
- “Centered”
![How to use Webnode.]()
- “Bottom”
![How to use Webnode.]()
- “Boxed Hamburger”
![How to use Webnode.]()
- “Hamburger”
![How to use Webnode.]()
- “Classic”

Working with Webnode Sections
To add content to the pages of your website, you’ll work with content blocks that Webnode calls “sections.” Each page includes a number of Webnode sections in different formats. Keep reading to learn how to add a section as well as use and edit some of the more common section types.
Adding a Section
You can choose from a variety of sections to populate your webpages.
To add a section:
- Hover your cursor over an area of your site where you want to add a section until the plus sign (“+”) icon appears.
![How to use Webnode.]()
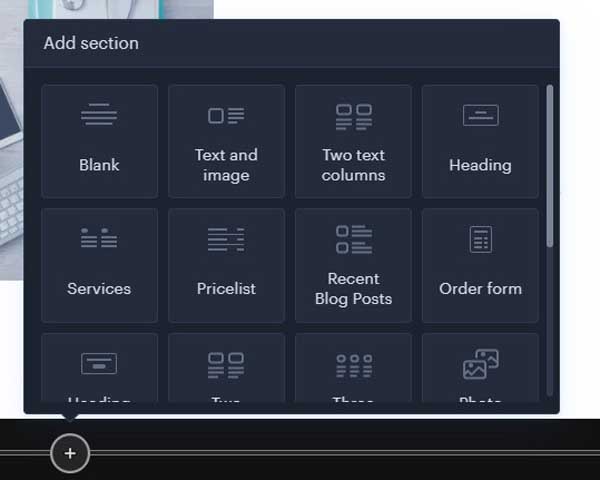
- Click on the plus sign (“+”) icon to open the “Add section” menu.
- Choose the type of section you want to add from the available options in this menu.
![How to use Webnode.]()
- Edit the section, as necessary, after you insert it onto a page of your website.

Changing a Section’s Background
You can change the background of a section to improve the way it looks and/or to differentiate a section from others on the same page to help improve your site’s overall UX.
To change a section’s background color or image:
- Hover your cursor over the section you want to edit until the “Gear” icon appears.
- Click on the “Gear” icon to open a drop-down menu of section settings.
- Click on the “Section background” option.
- Select one of the proposed background options or click on the plus sign (“+”) icon to see more options. You can select pre-installed patterns, images, or colors. Or, you can upload your own images or videos.
- When you’re finished with the section, click on the “Close” button.
Customizing Webnode Content
You also can modify the width and border of a content section on your Webnode website.
To customize a content section:
- Hover your cursor over the section you want to edit until the “Gear” icon appears.
- Click on the “Gear” icon to open a drop-down menu of section settings.
- Click on the “Advanced settings” link.
- Alter the width, as needed, or toggle the “Decorative border” button to “On” or “Off.”
- When you’re finished editing a section, click anywhere outside the “Section settings” menu.
Working With Images and Media in Webnode
Users can upload different media to the Webnode website builder. Premium plan subscribers can upload up to 400 megabytes. Media can include:
- Documents (.pdf, .doc, .docx, .ppt, .pptx, .pps, .ppsx, and more)
- Images (.jpg, .jpeg, .png, .gif, and .bmp)
- Audio (.mp3, .wma, .wav, and .ogg)
- Video (.avi, .wmv, .mov, and .mpg)
Adding Images in Webnode
- Hover your cursor over an area where you want to add a section until the plus sign (“+”) icon appears.
- Click on the plus sign (“+”) icon to open the “Add section” menu.
- Choose the type of section you want to insert from the available options.
- When Webnode inserts your chosen section on your website, it’ll automatically include placeholder text and images you can edit.
- Click on the image you want to change and a pop-up toolbar will then appear.
- Select the “Edit” option on that toolbar.
- Click on the “Replace” button.
- Choose an image from the Webnode media library or follow the steps to upload an image of your own.
Adding Videos to Webnode
The Webnode website builder enables you to insert videos from YouTube or Vimeo.
To insert a video:
- Hover your cursor over an area where you want to add a section until the plus sign (“+”) icon appears.
- Click on the plus sign (“+”) icon to open the “Add section” menu.
- Choose the “Video” section option.
- Paste the video link you want to insert in the provided field.
- Click on the “OK” button.
Adding Forms to Webnode
The Webnode website builder gives you several options to connect with visitors to your business website. The two most common options include:
- Contact forms
- Email subscription forms
Creating a Contact Form in Webnode
Most Webnode website templates include a “Contact Us” section or page where you include a contact form. But, you also can add a contact form anywhere on your website.
To add a contact form:
- Hover your cursor over an area where you want to add a section until the plus sign (“+”) icon appears.
- Click on the plus sign (“+”) icon to open the “Add section” menu.
- Choose the “Contact” section option.
![How to use Webnode.]()
- Update the heading, subheading, street address, phone number, email address, and social links in your new “Contact” section.
- Add your business to the geographical map by clicking on the map, typing in your business address, and then clicking on the “Enter” button on your keyboard.

Adding an Email Subscription Form to Webnode
An email subscription form lets you collect email addresses from site visitors. You can then use those addresses for marketing and contact purposes.
To add an email subscription form:
- Hover your cursor over an area where you want to add a section until the plus sign (“+”) icon appears.
- Click on the plus sign (“+”) icon to open the “Add section” menu.
- Choose the “Newsletter registration” section option.
- Adjust elements of your new email subscription form, as desired.
Adding Customer Testimonials to Webnode
As you collect testimonials and reviews from customers or clients, you can manually add them to your Webnode website.
To add customer testimonials:
- Hover your cursor over an area where you want to add a section until the plus sign (“+”) icon appears.
- Click on the plus sign (“+”) icon to open the “Add section” menu.
- Choose the “Testimonials” section option.
![How to use Webnode.]()
- Change the text of your new testimonial section, as necessary.
Editing the Webnode Footer
The Webnode website builder gives you limited options for editing your footer, but you can make minor edits for branding purposes.
To edit the footer:
- Click the “Gear” icon in the footer area at the bottom of your website to open a drop-down menu of footer settings.
- Follow the prompts to change the type of footer and the footer section background.
- To change the text, highlight the footer text you want to edit and type in your desired text.
Connecting Your Domain to Webnode
Before you can publish, you first need to connect a domain to Webnode. With the Webnode website builder, you have three options here: purchase a domain name from Webnode, transfer an existing domain to Webnode, or assign an existing domain to your new Webnode website.
Purchasing a Domain Through Webnode
When you purchase a Webnode premium plan, you’ll receive domain registration for a full year. But, you might want to buy another domain name for your website or purchase a domain name for your limited plan.
To purchase a domain, follow these steps:
Option A
- Start at “My Projects” on the Webnode dashboard. Click on the “Administration” tab.
- Choose the “Domain Management” option from the menu.
- Choose the “Register a new domain” option from the menu.
- Complete the prompts to finish purchasing and registering your new domain.
Option B
- On the website editing page, click on the “Settings” icon.
- Choose the “Domains” option from the menu that then appears.
- Choose the “Register a new domain” option from the menu.
- Complete the prompts to finish purchasing and registering your new domain.
Transferring a Domain to Webnode
If you already own a domain for your small business, you can transfer it to Webnode. Doing so makes it easier for you to manage your website because you can do it all through one company.
To transfer an existing domain to Webnode:
- Start at the website editing page and click on the “Settings” icon.
- Select the “Domains” option from the menu that then appears.
- Follow the “Use existing domain” link.
- Continue through the prompts to transfer your domain and pay any additional fees.
Assigning a Registered Domain to a Webnode Website
Do you already own a domain, but don’t want to transfer it to Webnode? You can still assign that domain to your Webnode website. You also can assign a domain you bought to any premium Webnode plan.
To attach an existing domain to your Webnode website:
- Begin at the website editing page and click on the “Settings” icon.
- Select the “Domains” option from the menu that then appears.
- Click on the “Manage domains” link.
- Select the “Transfer your domain” option.
- Scroll down until you see the “Need Help?” section.
- Expand the help item, “Can I use my own domain without transferring it to Webnode?”
- Select the “Here” link.
- Type in the name of the domain you want to attach.
- Click on the “Add domain” button.
- Read the DNS settings provided, and then follow the required steps to update the DNS record with your domain registrar.
Final Thoughts
As you can see, the Webnode website builder gives you lots of options for customizing your website. Most of the customization process is simple enough. But, if you find yourself struggling to figure something out, be sure to explore Webnode’s Knowledgebase. It provides detailed instructions for everything related to the company’s services.
To learn more about the Webnode website builder, how to structure a website, or starting and running a business, check out some of our other helpful articles:
Webnode Website Builder Review
How To Make a Webnode Website
How To Structure a Website